Choosing a domain and template
At a glance
- Pick a domain (skipped automatically if your organization only has one).
- Pick an existing template from a sortable list grouped into per-category accordion sections, or create a new one.
- Creating a template means describing the kind of document it maps, not building the mapping itself yet — that comes later.
Choosing a domain
The first screen lists the domains available to your operator — for example Intermodal or Retail. Pick one and confirm to continue. If your operator only has a single domain, MorphMapper skips this screen entirely and selects it for you.
Choosing a template
Next you'll see the list of templates already set up for that domain. You can:
- Sort the list — by default order, name (A→Z or Z→A), or most recently used.
- Enable or disable a template with the checkbox on its row, without opening it — a disabled template stays in the list but is skipped wherever the system would otherwise pick it up automatically.
- Pick an existing template to continue working on it, using the pencil icon on its row.
- Create a new template with the button below the list.
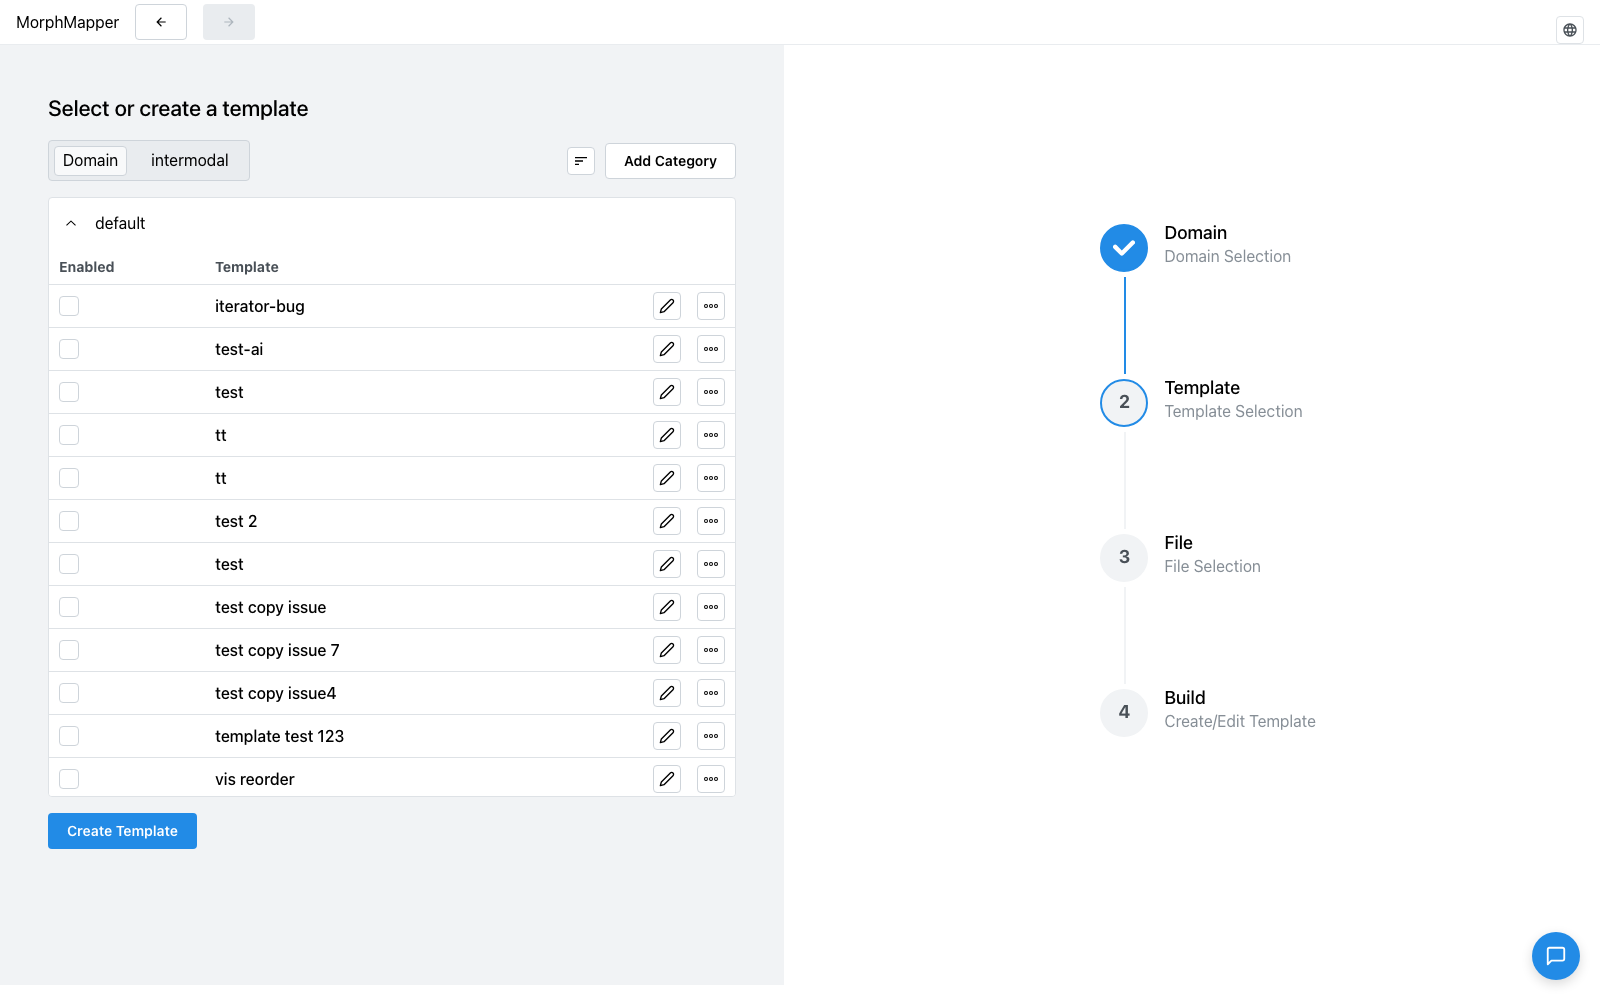
Templates are grouped into per-category accordion sections
There's no separate category filter control. The whole list is one Mantine accordion, with one collapsible section per category (verified against apps/builder-ui/src/components/setup/molecules/template-accordion/template-accordion.tsx and template-accordion-item.tsx). Every category shows in the list at once. Opening one to see its templates closes whichever section was open before, since the accordion only ever keeps one section expanded at a time.
The default category (every organization has one, and can't have a second one named that — see Managing templates) starts expanded when the screen loads; every other category starts collapsed, showing just its name as a clickable header until you open it. Categories are always ordered alphabetically by name, with one exception: a category named "Other" is always pushed to the very end — this matches Managing templates, since it's the same accordion component in both places.
The Sort control (the sort icon next to Add Category) reorders the templates within each category's section — it doesn't change which category is expanded or reorder the categories themselves.

Confirmed live: on a domain with the categories default, test, test23, and testt, the screen loads with default's templates listed and the other three collapsed to bare header buttons; clicking test's header expands it and collapses default back down to its own header.
Creating a new template
Creating a template means describing what kind of document it will map. You build the actual mapping logic later, in the main editor. The form asks for:
| Field | Type | Description |
|---|---|---|
| Name | Text | What the template will be called in the list. |
| Type | Radio | Free-form classification, for example an invoice vs. a packing list. MorphMapper labels this field "Input Source" in the UI, the same label used by the input source field below — they're different settings despite the shared label. |
| Variant | Radio | The file format the template is built for: PDF, table, XML, text, email, or JSON. |
| Schema | Select | Which underlying schema to build on. Becomes available only after you've picked a type and variant. |
| Input source | Select | How the source document will arrive: an uploaded file, an email attachment, or HTTP. Choosing HTTP reveals connection settings — how the connection authenticates and the credential fields that method needs. See Configuring input sources for details of each. |
| Category | Select | Which category to file the template under, for organizing the list you just came from. |
| Priority | Number | Ordering weight within its category. |
| Description | Text | Free text, shown wherever the template is listed. |

Once created, the new template becomes the one you're setting up — setup continues straight to file upload.
Editing an existing template's settings
A template you already have can have these same settings — name, input source, category, priority, description — updated after the fact, without creating a new one, from the same list. See Managing templates for this, plus duplicating, deleting, and organizing templates into categories.